Actions, Attachments & Attributes
Introduction
While similar in function, Actions, Attachments, and Attributes each serve a distinct purpose in documenting case activity. Understanding the difference between them ensures accurate and consistent case records.
- Actions — Capture any step taken to respond to or address an incident or concern. Each time a user takes a meaningful step in a case it should be recorded as an Action. Examples include meetings, emails sent, and referrals for resources or support
- Attachments — Include any additional documentation relating to the case. Attachments document information or items received or generated that do not capture a specific action taken. Examples include photos, formal documents, and supporting emails or evidence
- Attributes — Describe factors that may have contributed to the occurrence or outcomes of a given case. Attributes do not describe the behavior itself but provide additional context. Multiple attributes may be selected if appropriate
Actions
To add an Action navigate to the Actions tab in the Case Menu and click the + Add Action button. This will open a slide-over panel where you can complete all required fields marked with a red asterisk. Click Save when complete.
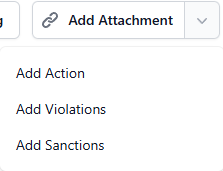
The dropdown arrow next to the + Add Action button also allows you to add a Violation or Sanction directly from the same menu. The Filter button on the right allows you to filter the Actions list by classification.
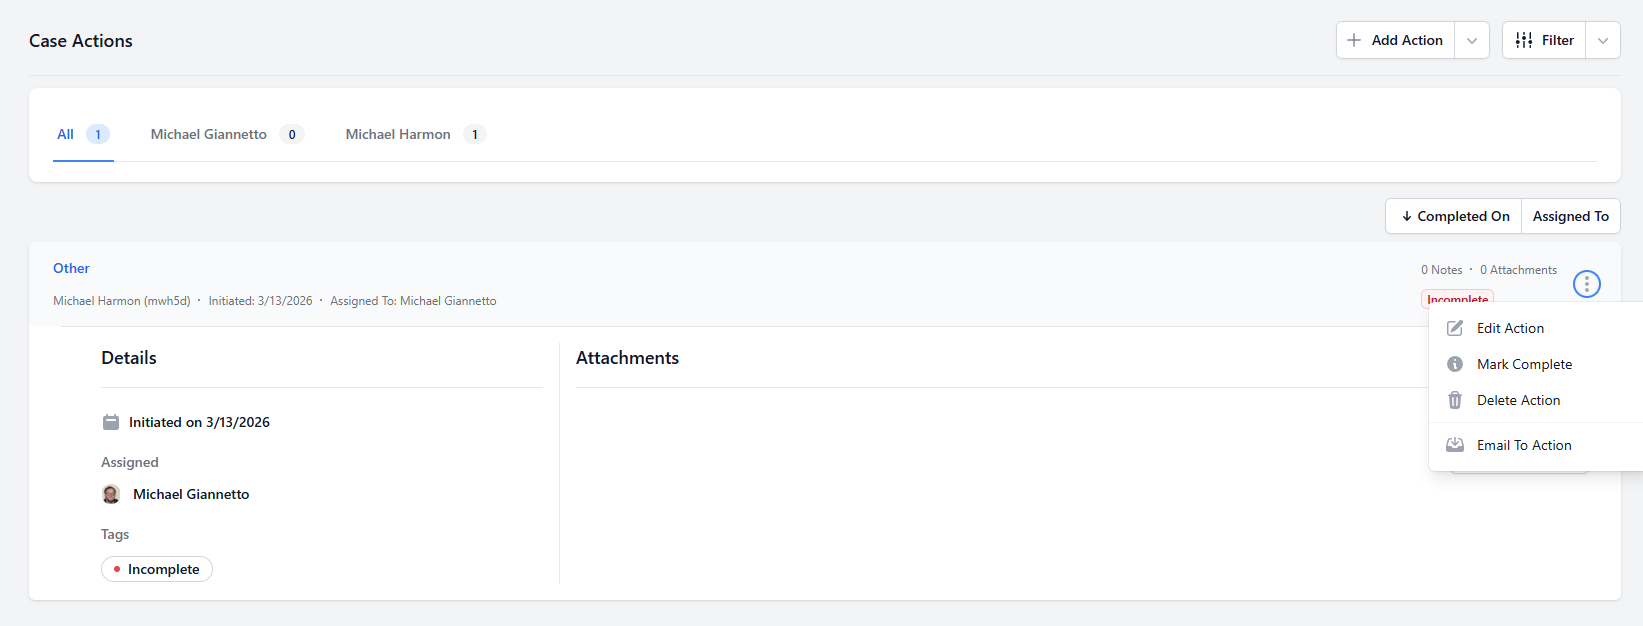
After saving a new Action it will appear in the Actions list along with any previously recorded Actions.
Action Options
Each Action has an ellipsis menu with the following options:
- Edit Action — Update or add information to an existing Action
- Mark Complete — Marks the Action as complete and removes it from your To-Do List
- Delete Action — Permanently removes the Action from the case
- Email To Action — Attach an email directly to the Action
Actions and My To-Do List
Pending Actions will appear in your My To-Do List widget on the Dashboard until a completed date has been added. This is useful for tracking Actions that have been initiated but not yet finished.
To use this feature simply create a new Action with an Initiated Date but leave the Completed Date blank. The Action will appear in your To-Do List as a reminder. Once you add a Completed Date the status will update to completed and the Action will be removed from your To-Do List.
Creating a New Action vs Adding to an Existing Action
Each separate event should be documented as its own Action. For example if you meet with an Involved Party on Monday and again on Friday those should be two separate Actions, each labeled Meeting with relevant notes for each.
If you want to add new or updated information to an existing Action — such as adding meeting notes or a Completed Date — use the Edit Action option from the ellipsis menu. When editing an Action the Notes field will appear blank but your previous notes have not been deleted. Any new notes you add will display above older ones after saving. You can view all notes for an Action by expanding it from the Actions page.
Attachments
Attachments allow you to add additional files to a case such as photos, documents, and video files. Attachments are added from the Add Attachment button in the Case Header.
Adding an Attachment
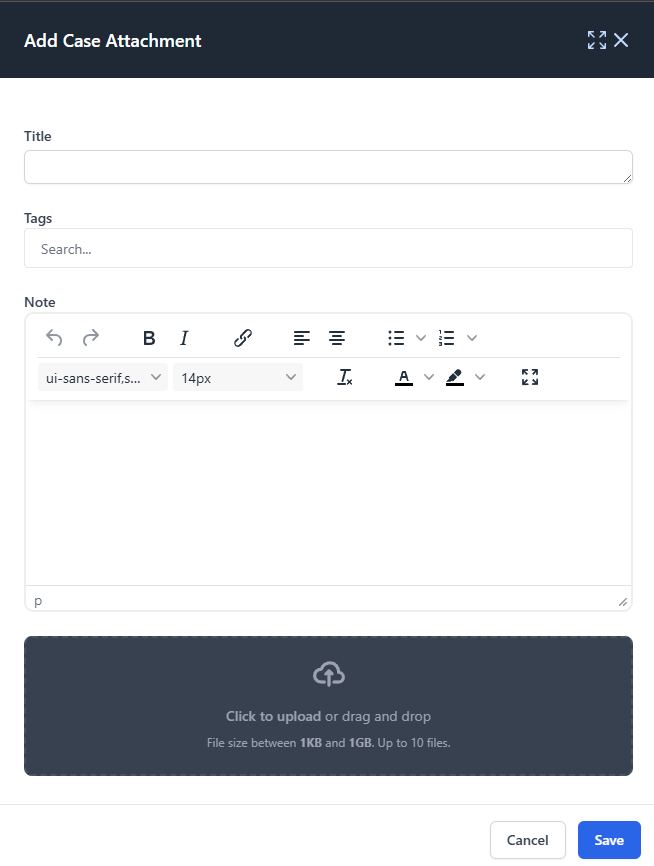
Clicking Add Attachment opens the Add Case Attachment slide-over where you can complete the following fields:
- Title — Enter a descriptive name for the attachment
- Tags — Add tags to help describe the type of documentation. For a full list of attachment tags see the Attachment Tags Reference
- Note — Add any relevant notes about the attachment. The note editor supports text formatting including bold, italics, and highlighting
- File Upload — Click to upload or drag and drop your file. File size must be between 1KB and 1GB and up to 10 files can be uploaded at once
Viewing Attachments
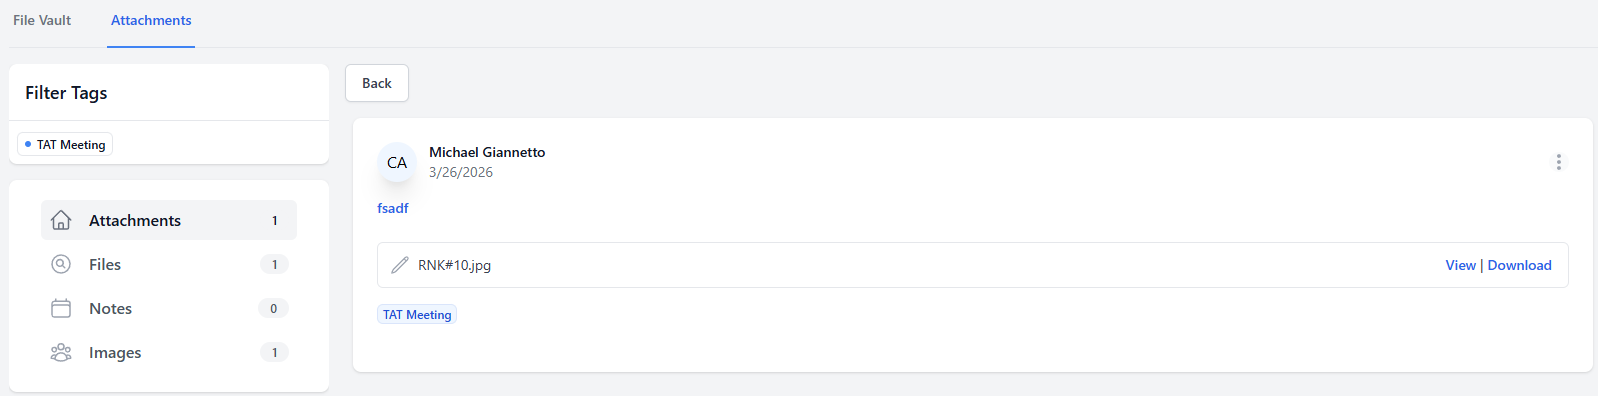
To view all attachments on a case navigate to the Attachments tab in the Case Menu. This tab has two views — Attachments and File Vault — accessible from the tabs at the top of the page.
Attachments View
The Attachments view displays a grid of all attachments associated with the case showing the Type, Title, Created On date, and Tags for each entry. You can use the Filter Tags panel on the left to filter attachments by tag.

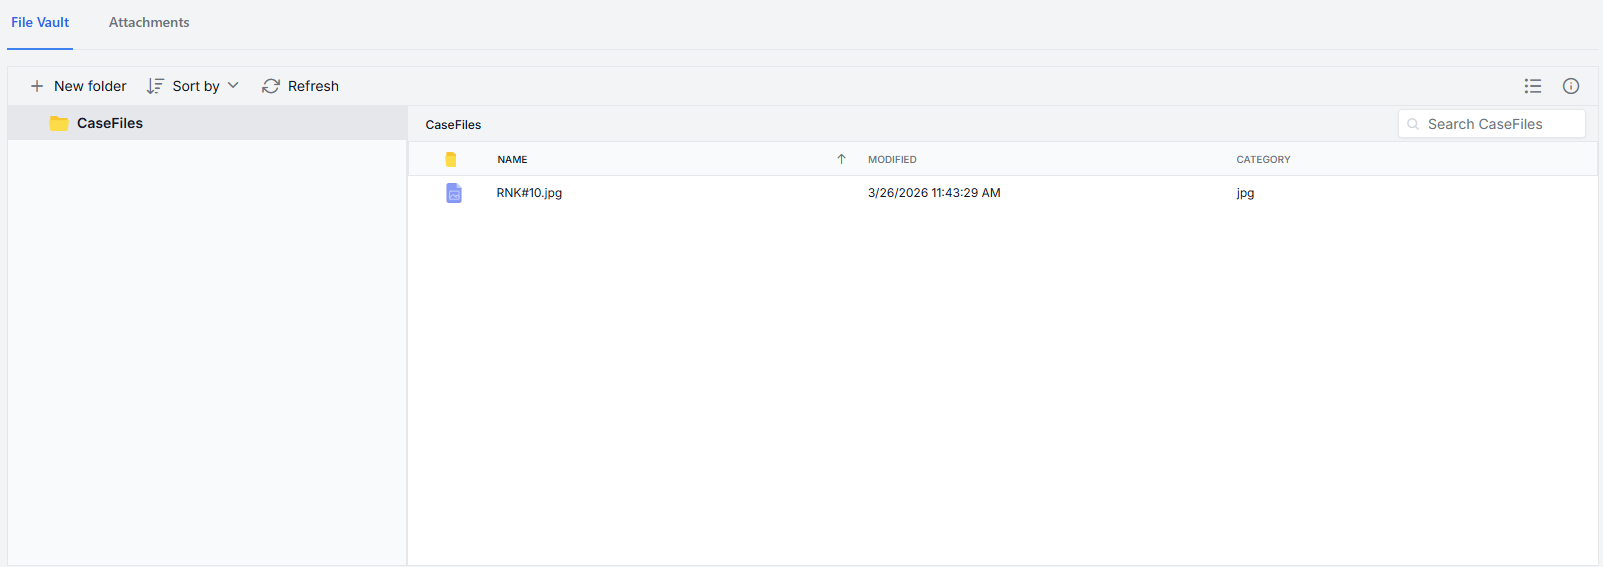
File Vault View
The File Vault provides a folder-based view of all files attached to the case. You can create new folders to organize files, sort by name or date, and search for specific files. Each file displays its Name, Modified date, and Category.
Managing Attachments
Clicking into an attachment from the Attachments grid opens the full attachment record. From here you can:
- Edit the attachment title using the pencil icon next to the title
- Click the ellipsis menu to access the following options:
- Edit Attachment — Update any fields on the attachment
- Delete Attachment — Permanently remove the attachment from the case
- Use the View or Download links to open or save the attached file
Attributes
Attributes document information about potential contributing or related factors of a given incident or behavior. They do not describe the behavior itself but provide additional context for reporting and data collection purposes.
Some attributes such as Bias may trigger notifications to appropriate University officials and may be used to generate public reports. Multiple attributes may be selected if appropriate.
Example attributes include:
- Alcohol
- Drugs
- Identity Development
- Bias/Race
- Bias/Ethnic Origin
- Bias/Political Affiliation
Attributes are documented at the top of the case information and will be displayed there after selection. For a full list of Case Attributes see the Case Attributes Reference.
Adding or Editing Attributes
- New Cases — Attributes can be selected from the Attributes dropdown while creating a new case on the Add Case page
- Existing Cases — To add or update Attributes on an existing case select Edit from the Case Menu and scroll down to the Attributes field