Case Overview
Overview
After submitting a new case using the Add Case page, you will automatically be directed to the Case Overview page for that case. The Case Overview page is the primary workspace for viewing and managing an individual case. It provides a complete snapshot of the case at a glance, while allowing quick access to classifications, involved parties, team members, and related actions.
All information entered on the Add Case page or captured through an intake form is displayed within the Overview.
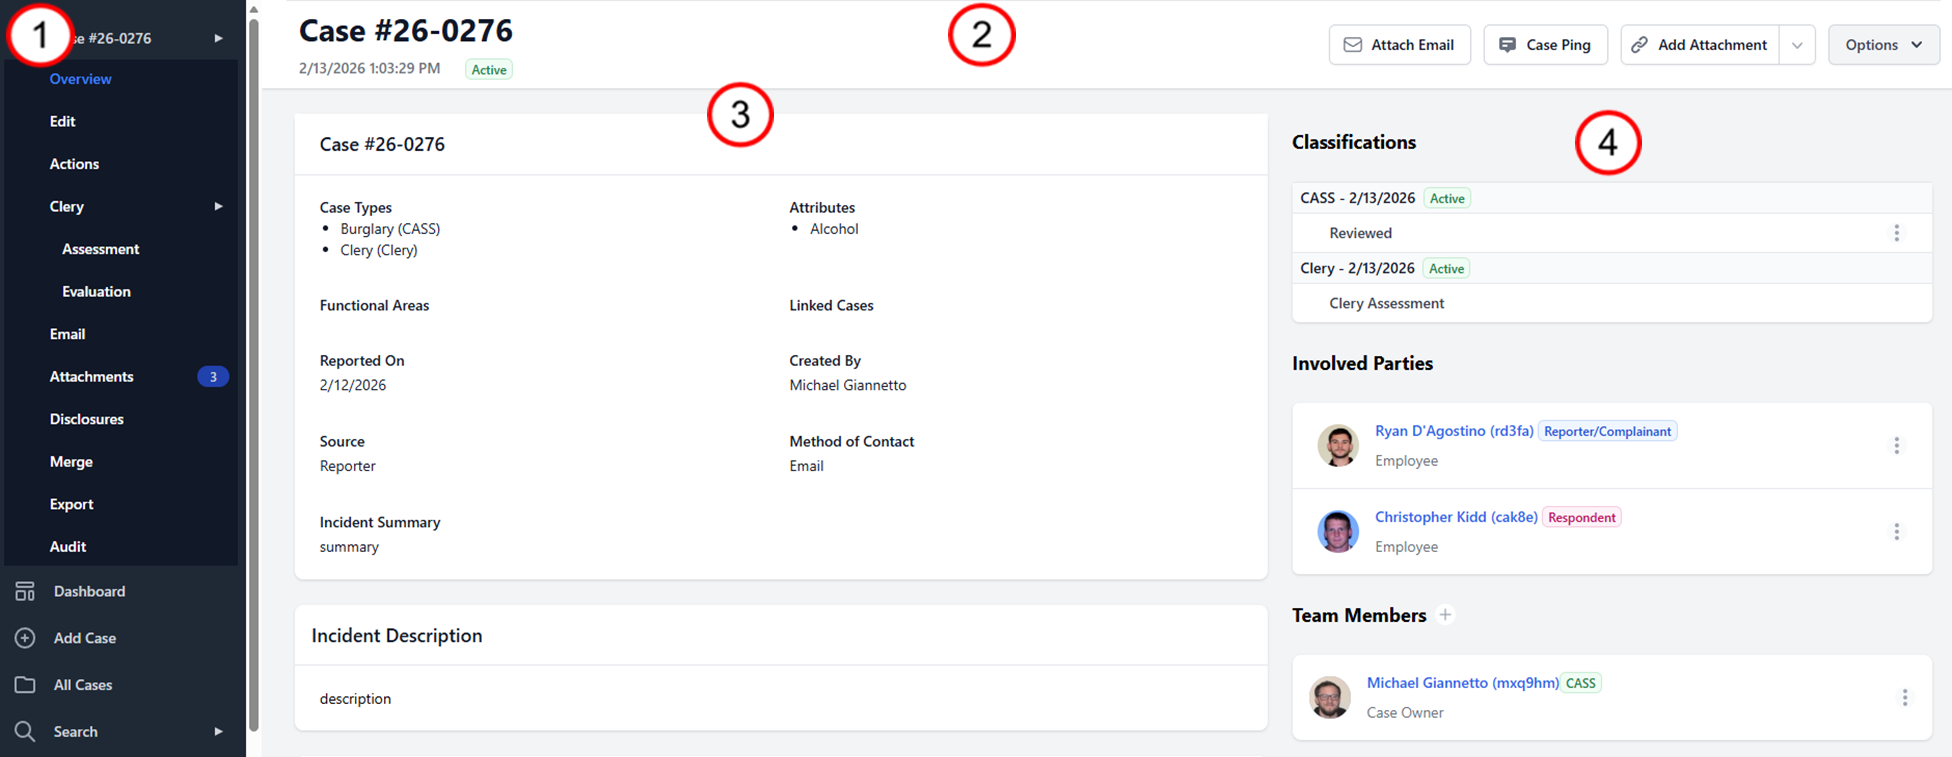
The Case Overview page is organized into four primary functional areas:
- 1 — Case Menu — Access to all sections of the case
- 2 — Case Header — Key identifying information and case tools
- 3 — Case Summary — Full case information and incident details
- 4 — Case Management — Active handling panels including classifications, involved parties, and team members
Case Menu
The Case Menu provides access to all sections of the case. Each menu item is described below:
- Overview — Displays the Case Overview page, providing a snapshot of the case including case information and management panels
- Edit — Used to update Case Information and incident details
- Actions — Record of all actions, violations, and sanctions taken in response to a report or case
- Clery Assessment — Where the Clery Compliance Officer completes Clery violation/crime assessments and Timely Warning Assessments
- Clery Evaluation — Record of Clery-related determinations and evaluations associated with the case
- Evaluation Panel (Select Classifications Only) — Record of Title IX Evaluation Panels for Prohibited Conduct cases
- Decision Matrix (Select Classifications Only) — Record of determinations made by the Title IX Coordinator regarding University Resolution
- Resolution (Select Classifications Only) — Record of steps taken to resolve a case under the Title IX Resolution process
- Email — Send and document emails directly within SafeGrounds
- Attachments — Record of all case-related documents and evidence
- Disclosures — Record of disclosures made to law enforcement entities
- Merge — Allows users to merge or combine the case with another case
- Export — Export or print case information
- Audit (Limited Access) — Record of all changes made to the case record
Case Header
The Case Header appears at the top of the page and displays key identifying information about the case including the case number, date and time created, and current case status.
The Case Header also contains buttons that provide access to commonly used case tools and administrative functions:
| Button | Description |
|---|---|
| Attach Email | Attach existing email correspondence to the case record. Click Attach Email to open a slide-over and copy the unique email address for that case. Forward the email you want to attach to that copied address and it will appear in the case. Note that it may take a minute or two for the attachment to appear. |
| Case Ping | Send a case-related notification to selected users |
| Add Attachment | Add items directly to the case including Violations, Sanctions, or Actions |
| Options | Access additional case-level tools such as adding the case to a docket, editing case types or classifications, linking cases, watching a case, copying a case, deleting a case, and other administrative functions |
Case Information
The Case Information section provides a structured view of the details entered when the case was created. At the top of this section you will see high-level case details including:
- Case types
- Attributes
- Functional areas
- Reported date
- Source
- Method of contact
- Created by
- Linked cases
As you scroll down the page, additional information blocks appear including Incident Date and Time Information, Incident Location Information, and Incident Details. This layout allows users to review both summary-level and detailed case information in one continuous view.
Inline Editing
Most case information fields can be edited directly from the Case Overview page without navigating to the Edit page. To edit a field inline:
- Hover over the field you want to edit until a pencil icon appears
- Click the Edit button that appears
- Make your changes
- Click Save to apply the changes

Case Management
The Case Management section appears on the right side of the page and contains panels related to the active handling of the case.
Classifications
Displays classifications applied to the case, including status and review information. For more information see Case Types & Classifications.
Involved Parties
Lists individuals associated with the case and their roles. For more information see Involved Parties.
Team Members
Displays users assigned to the case and their roles. Team Members represent University staff who have a role in responding to a reported incident or concern.