Getting Started
Main Menu & Dashboard
An overview of your SafeGrounds homepage and key functions
Introduction
After logging in, SafeGrounds will open on the All Cases page. To navigate to your dashboard, select Dashboard in the Main Menu. Your Dashboard is a personalized page where your widgets will be displayed.
A Widget is an organizational tool designed to support the workflow of specific offices, individuals, and response processes. Widgets are customizable and you can choose the widgets that are most beneficial to your daily routines.
On the left side of the screen is the Main Menu and can be accessed from any screen while on SafeGrounds.
Main Menu
The Main Menu is located on the left side of the screen and is accessible from every page in SafeGrounds.
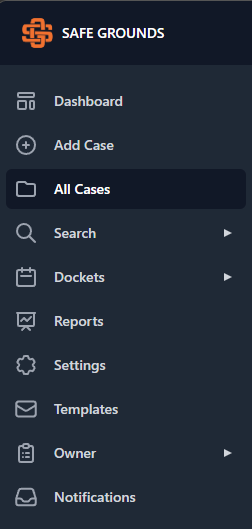
- Dashboard — Your personalized widget-based homepage
- Add Case — Create a new case in the system
- All Cases — View all cases you have permission to access
- Search — Access all search functions
- Dockets — View and manage dockets
- Reports — Access reporting tools
- Settings — System configuration options
- Templates — Manage case templates
- Owner — Classification Ownership and oversight tools
- Notifications — Clery-related case notifications
Note: The menu items visible to you will vary depending on your assigned User Role. Not all users will see every option listed above.
Dashboard Overview
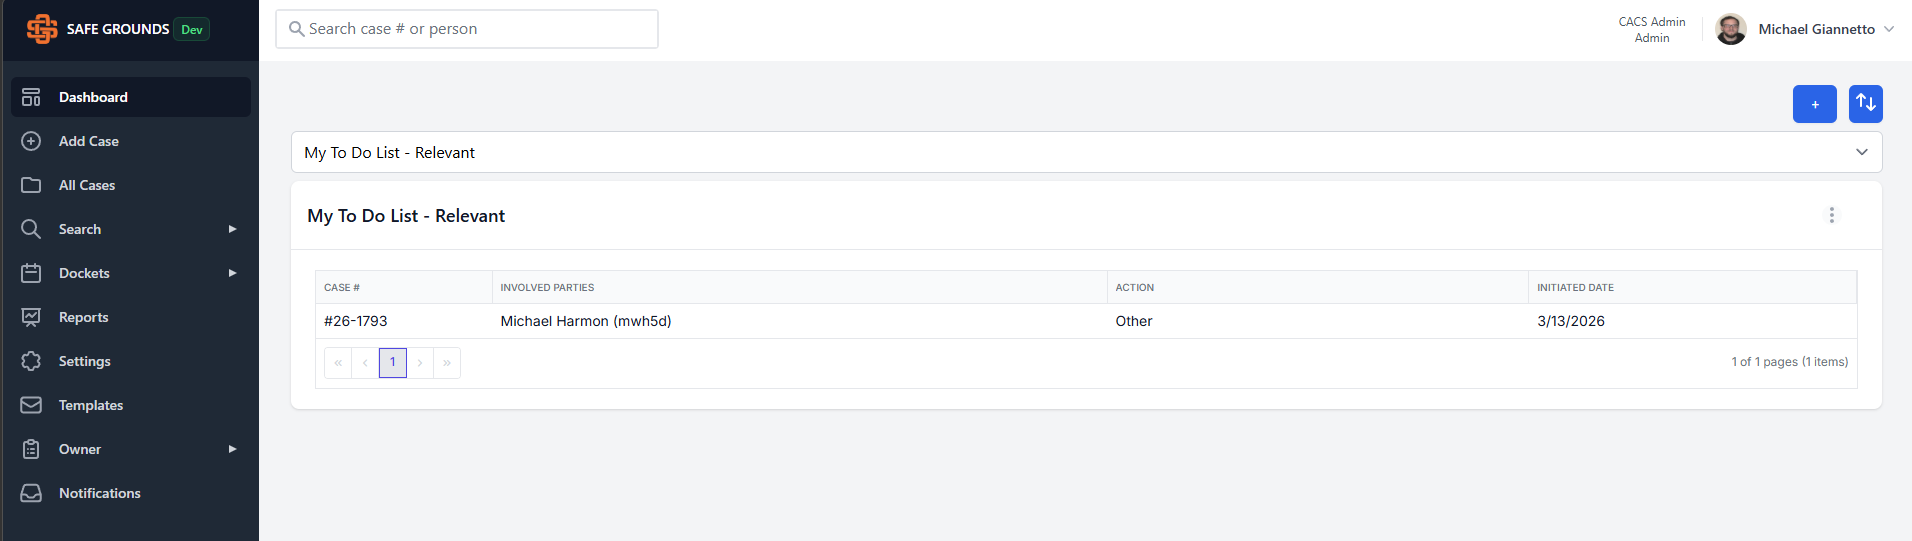
Note: The figure above is an example Dashboard and is not an indication of how your Dashboard appears.
- Main Menu — Viewable and accessible from all pages
- Search Bar — Used to search SafeGrounds. See Searching for more information
- + Button — Used to add widgets to your dashboard
- Widget Dropdown — Allows you to see your current active widgets
- Ellipses Menu — Allows you to edit or delete the active widget
- Widget Display Area — Where the widget information will be displayed
- Reorder Widgets — Drag and drop widgets into your preferred order using the blue up/down arrow button
Adding a Widget
- Click the + button in the top-right corner of your dashboard.
- From the menu, select the widget you want to add.
- Complete the parameter fields, then click Save.
- The new widget will appear on your dashboard and will also be listed in the dropdown menu.
Editing a Widget
- Click the ellipses in the top-right corner of your dashboard.
- Complete the parameter fields, then click Save.
- To edit the preferences of a specific widget, select it from the dropdown menu.
- Repeat steps 1 and 2 as needed.
Sorting Displayed Information in a Widget
- Widgets have multiple columns identified by headers.
- If a column is sortable, a gray arrow will appear in its header when you click it.
- Clicking a sortable header will reorder the widget's data (e.g., A–Z, Z–A, newest to oldest, or oldest to newest).
Example: In the My To-Do List Widget, to sort by Case #, click the column header then click the arrows to sort A–Z or Z–A.
Example Widgets
- My To-Do List — A running list of Actions that have been initiated but are incomplete
- Team Member Cases — All cases, open or closed, that you are a Team Member on
- My Watchlist — Cases you want to keep an eye on. You can add a note to yourself about why a case is on your Watchlist